Connect to your computer
Complete the following steps to setup your Wacom Cintiq Pro:
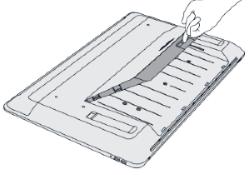
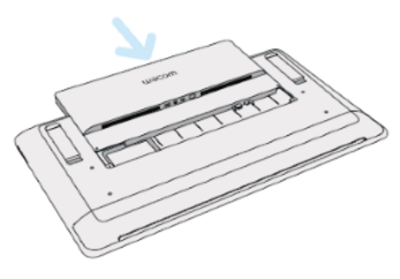
- Gently lay the Cintiq Pro face down on a flat surface clear of debris.
- Remove the back cover by pulling it away at the cable opening.
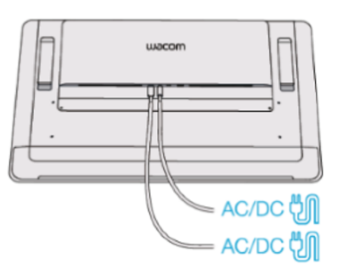
- Connect your device to a power source using the power cable and AC adapter.
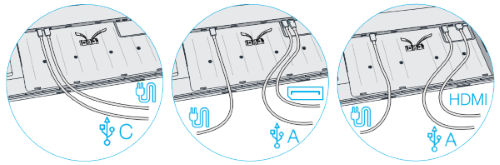
- Determine what ports are available on your computer and attach your Cintiq Pro:
- USB-C: Attach the USB-C cable from your computer to the Cintiq Pro.
- DisplayPort: Attach the DisplayPort cable and the USB-A cable from your computer to the Cintiq Pro. (This connection method does not apply to some regions)
- HDMI: Attach the HDMI cable and the USB-A cable from your computer to the Cintiq Pro. (This connection method does not apply to some regions).
- Other: To function correctly both data and video cables must be attached from your computer to the Cintiq Pro. Data is communicated by the USB connection. If you have none of the above video connections available you may be able to purchase a converter which will allow you to connect video. Please contact Wacom Support if you need assistance.
- Bundle the cables with the attached cable ties.
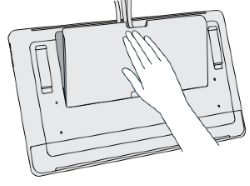
- Reattach the back cover, allowing the cables to pass through the cable opening.
- Gently flip the Cintiq Pro so that it is face up and positioned for use.
- Confirm your computer is on, and then turn on your Cintiq Pro by pressing the power button.
- Follow the instructions on the Install the Wacom driver page.
- Your Cintiq Pro should now be functional. Check Test the creative pen display if you are not seeing input from pen and touch.
- Access FAQs and other product information on the Wacom Cintiq Pro Getting Started page of the Wacom website.
Important: Installing the driver is required for pen & touch to function on your Cintiq Pro.
Install Your Wacom Cintiq Pro Engine to Create the Wacom Cintiq Pro Studio
The Cintiq Pro combines with the optional Cintiq Pro Engine to create the Cintiq Pro Studio. Complete the following steps to set up your Cintiq Pro Studio:
- Gently lay the Wacom Cintiq Pro face down on a flat surface clear of debris.
- Remove the back cover by pulling it away at the cable opening.
- Use the provided tool to remove the screws securing the attached cable ties, and then remove the cable ties.
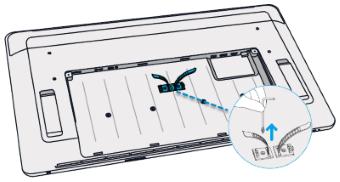
- Gently insert the Cintiq Pro Engine into the Cintiq Pro, using the guide rails to ensure proper alignment.
- Use the provided tool to tighten the two screws securing the Cintiq Pro Engine to the Cintiq Pro.
- Connect the Cintiq Pro power cable to the Cintiq Pro Engine.
- Connect the Cintiq Pro Engine power cable to the Cintiq Pro Engine.
- Gently flip your Cintiq Pro Studio so that it is face up and positioned for use. If desired, extend the stand legs to position your Cintiq Pro Studio at an angle.
- Turn on your Cintiq Pro Studio by pressing the power button.
- Your Cintiq Pro Studio should now be functional. Check Test the creative pen display if you are not seeing input from pen and touch.
- Access FAQs and other product information on the Wacom Cintiq Pro Studio Getting Started page of the Wacom website.
Note: Before proceeding, ensure there are no wired connections to your Cintiq Pro, including removing the power cable, AC adapter, and all USB connections. All ports on the back of your Cintiq Pro must be open for proper installation of the Cintiq Pro Engine.
| | Do not share my information | | Cookies | | Terms of use | | Privacy Policy |