Connect to your computer
After you have removed your Cintiq Pro from the box and are ready to begin using it, complete the steps below to connect to your computer. You can also reference the Quick Start Guide included in the Cintiq Pro box.
Connect your Wacom Cintiq Pro 22 to your computer
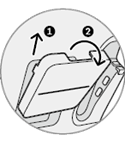
- Open the two cable cases on the back of your Cintiq Pro by pulling each case cover up (1) and out (2) to expose the ports on your Cintiq Pro.
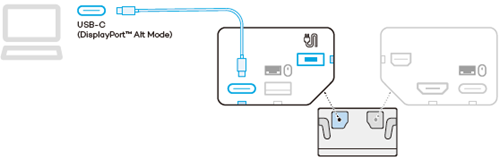
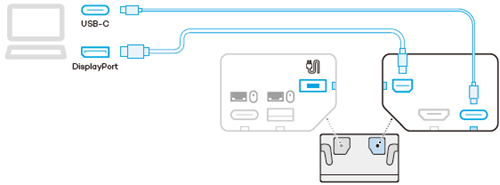
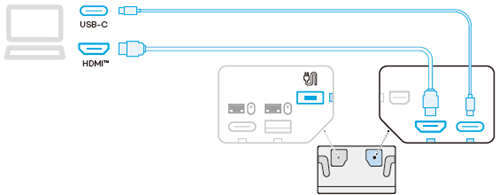
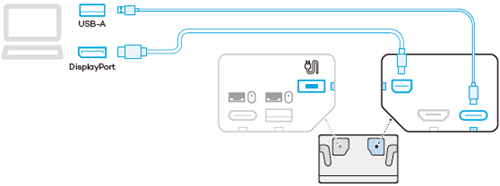
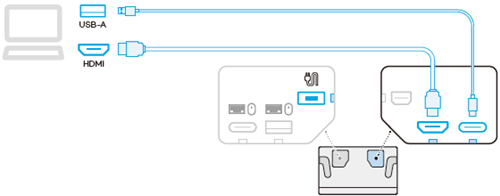
- Connect your Cintiq Pro to your computer using one of the methods illustrated in the table below, depending on your computer's setup:
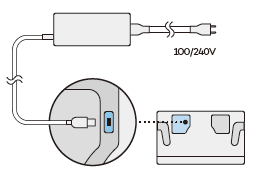
- Connect your device to a power source using the power cable and AC adapter. The power connection port is on the back, left side of your Cintiq Pro.
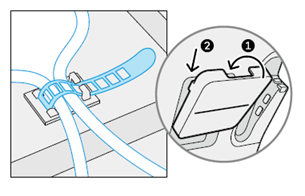
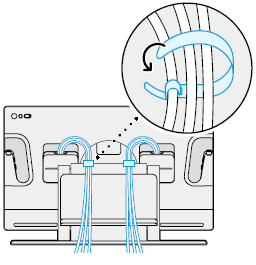
- Secure the cables using the attached bands on each side of your Cintiq Pro and thread the cables through the top of each case. Close the case covers by sliding the cover in (1) and down (2).
- Wrap the cables together using the cable ties included with your Cintiq Pro.
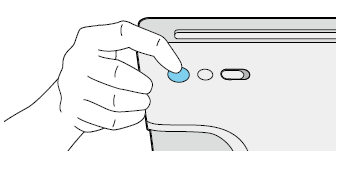
- Press the power switch to turn your Cintiq Pro on.
- Follow the instructions on the Install the Wacom driver page.
| Port(s) on your computer | Cable(s) needed to connect the Cintiq Pro to your computer |
|---|---|
| USB-C DisplayPort™ Alt mode (supports video output) |
USB-C to C cable inserted into the USB-C DisplayPort on the back, left side of your Cintiq Pro
|
| USB-C port (does not support video output) DisplayPort |
USB-C to C cable inserted into the USB-C port located on the back, right side of your Cintiq Pro DisplayPort cable
|
| USB-C port (does not support video output) HDMI port |
USB-C to C cable inserted into the USB-C port located on the back, right side of your Cintiq Pro HDMI cable
|
| USB-A port DisplayPort |
USB-C to A cable inserted into the USB-C port located on the back, right side of your Cintiq Pro DisplayPort cable
|
| USB-A port HDMI port |
USB-C to A cable inserted into the USB-C port located on the back, right side of your Cintiq Pro HDMI cable
|
| Do not share my information | | Cookies | | Terms of use | | Privacy Policy |