Workflow settings
Workflow settings are a type of application-specific settings that provide you with more settings options for an application. Workflow settings allow you to easily switch between different workflows – Color editing, Drawing, Painting, Photo editing, etc. – when using a customizable component (Pen, ExpressKeys, etc.) within an application.
Use a pinned menu to switch between Workflow settings without opening Wacom Center.
Topics on this page
- Create a Workflow setting
- Use Workflow settings
- Pin the Workflow settings menu
- Delete a Workflow setting
Create a Workflow setting
When you create a Workflow setting, it applies to the currently selected customizable component (pen button, On-screen shortcut key, Touch gesture, etc.) and the currently selected application (Photoshop, Krita, etc.).
- Open Wacom Center.
- Select a customizable component in the Devices sidebar (pen, ExpressKeys, etc.).
- Select an application in the Application-specific settings list at the bottom of Wacom Center. If no applications are listed, click the plus
 icon to add one.
 - Click the arrow
 to open the Workflow settings menu and select + New.
 - On the Workflow set window, create a Name for the Workflow and optionally select an Icon. The Workflow will be populated with the current settings. Any additional modifications will update the Workflow.
Use Workflow settings
- Open Wacom Center.
- Select your customizable component in the Devices sidebar (pen, ExpressKeys, etc.).
- In the Application-specific settings list at the bottom of Wacom Center, click the arrow to open the Workflow settings menu.
- Select the Workflow you want to use from the menu.
- To switch to a different Workflow settings group: click the arrow again and select another Workflow setting from the menu. Or, select a Workflow setting from a pinned menu.
To edit a Workflow settings group: make your changes to the currently selected Workflow setting; the changes will automatically be applied and saved to the Workflow.
Pin the Workflow settings menuYou can pin the Workflow settings menu to a display screen and use it to conveniently switch between different workflows. Assign "Launch Workflow menu” to a Pen button, ExpressKey, or On-screen shortcut key (depending on your device features). Activate the pen button, ExpressKey, or On-screen shortcut key to display the pinned Workflow menu. |
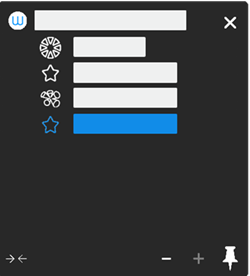 The above screenshot is for illustrative purposes; it may not match your screen. |
Delete a Workflow setting
When deleting a Workflow setting, you can delete it for the current settings page or for all settings pages.
- Click the arrow to open the Workflow settings menu.
- Hover over the Workflow setting you want to delete and click the more options
 icon.
icon. - Select "Delete" and choose one of the following options:
Delete workflow for this page only This option will delete the Workflow settings for the current settings page (Pen settings, for example). The Workflow settings will remain available for any other settings page in Wacom Center. Delete workflow for all pages This option will delete the Workflow settings for the currently selected application for all of the settings pages it is applied (Pen settings, ExpressKey settings, etc.).
| | Do not share my information | | Cookies | | Terms of use | | Privacy Policy |